Showing posts with label Featured. Show all posts

Saturday, December 18, 2010

Almond Stuffed Chicken with Long Grain Rice and Peppers


Source::http://sydneyskitchen.tv/2010/12/15/almond-stuffed-chicken-with-long-grain-rice-and-peppers/?tpref=foodpress Almond-stuffed chicken with rice and peppers Almond-stuffed chicken with rice and peppers

Dinner Dinner


The easiest way to switch up a chicken meal is to add stuffing.  It brings a whole new dimension to the meal.  New flavors, tastes and textures how can you go wrong?


For the Chicken

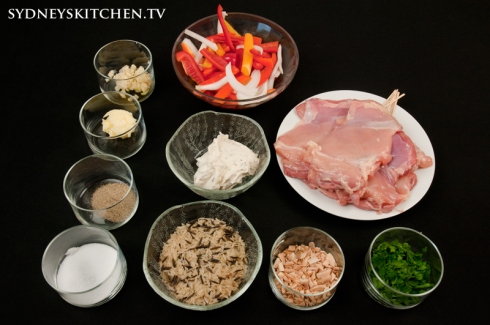
Ingredients for Chichen and Stuffing Ingredients for Chichen and stuffing


1/3 cup light garlic and herb cream cheese


1/4 cup slivered almonds, toasted, coarsely chopped and divided


3 tablespoons chopped fresh parsley, divided


4 skinless, boneless chicken breasts, washed and dried


1/2 teaspoon salt


1/4 teaspoon pepper


1 1/2 tablespoon butter


In a small bowl, combine the spreadable cream cheese, 3 tablespoons of toasted almonds, and 2 tablespoons of parsley and set aside.


Cut a horizontal slit through the thickest portion of the breast to form a pocket.  Stuff 1 1/2 tablespoons of the cheese mixture into each pocket; secure each pocket with a wooden tooth pick.  Sprinkle the chicken breast with salt and pepper.

Cooking the chicken Cooking the chicken


Heat the butter in a large non stick fry pan over medium heat.  Add the chicken to the pan; cook 6 minutes on each side and then place on a baking sheet and place in the oven for 5-10 minutes at 400F until done.  Remove from the pan; cover and let stand for  2 minutes.  Top the chicken with the remaining tablespoon of almonds and remaining tablespoon of parsley.

Cooking Stuffed Chichen Cooking Stuffed Chichen


For the Long Grain Rice

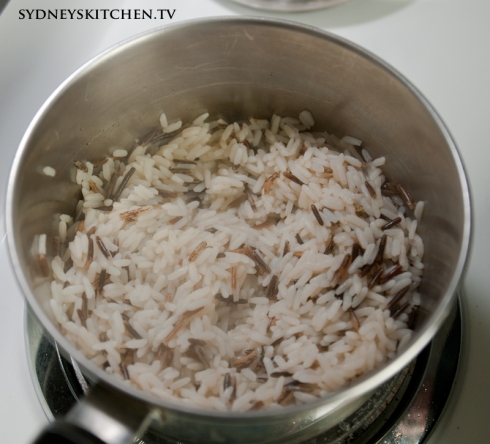
Rice Rice


1 cup water


1/2 cup long grain rice


1/2 teaspoon salt


1 teaspoon of butter


In a small pot boil the water and add the salt and butter; add the rice and boil for a few minutes and then reduce the heat and cover.  Simmer for 20-25 minutes until the water is gone then fluff with a fork.


For the peppers

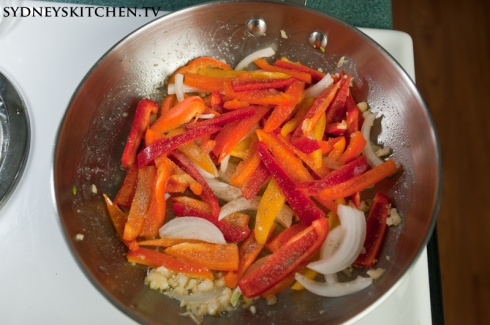
cooking the peppers cooking the peppers


1 each Red, Orange and Yellow bell peppers


3 cloves of minced garlic


2 teaspoons butter


salt and pepper


In a medium fry pan melt the butter until foamy then add the garlic and saute until fragrant.  Add the peppers and saute until tender but not too soft; add salt and pepper to taste.

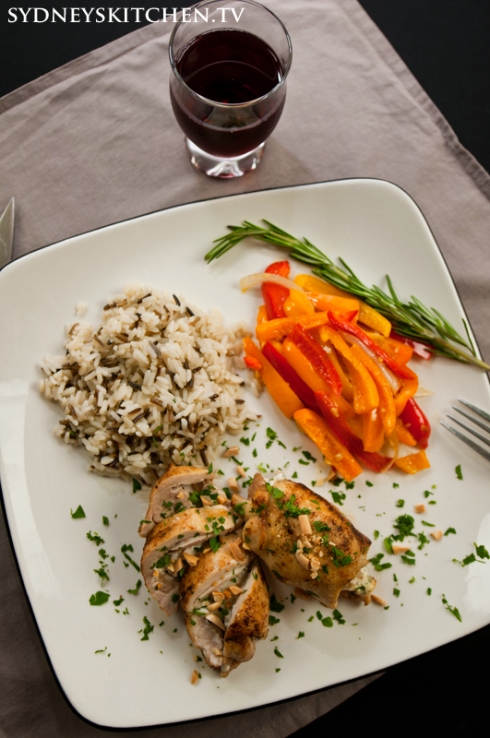
Almond-Stuffed Chicken with rice and peppers Almond-Stuffed Chicken with rice and peppers


This was an amazingly simple meal with an abundance of taste and texture.  I really love the crunch of nuts in the stuffing it really is something different and it is so tasty!    The whole meal takes only 30-40 minutes to prepare depending on your oven and cook time.  I assure you there will be no disappointment here!


View the original article here

Cream Cheese Coffee Cake


Source::http://whaticrave.wordpress.com/2010/12/14/cream-cheese-coffee-cake/?tpref=foodpress

Over the weekend, my sister, brother-in-law and their two kids came up to stay.  We wanted to have our cousin Elsie, resident family photographer, photograph the kids so that we could surprise my parents for Christmas (shhh..).  I see my sister fairly often and when we get together, it’s a zoo.  I always imagine that the mornings will be leisurely, where my sister and I lounge around with our coffee cups and chit chat about this and that.  In reality, the kids go nuts and run around in circles until someone barfs or drops from dizziness and we get to clean up the mess.  But it is fun.  And we do get to talk a bit over coffee.

Knowing it would be a little chaotic to whip up a big breakfast the next day, I made a cream cheese coffee cake the night before.  I served it at room temperature the next day and it was good but it would be great warmed up.

Cream Cheese Coffee Cake

Makes one 8-inch round cake

Filling

8 ounces cream cheese, room temperature

1 egg

1 teaspoon maple syrup

1/8 teaspoon stevia

Cake

6 eggs

3 tablespoons butter, melted

1/2 cup yogurt

3 tablespoons maple syrup

1/4 teaspoon stevia

1 teaspoon almond extract

1/2 cup + 1 tablespoon coconut flour, sifted

1/2 teaspoon baking soda

1/4 teaspoon salt

1/4 cup pecans, chopped

1 tablespoon coconut sugar

1 teaspoon cinnamon

Preheat oven to 325 degrees F.  Grease one 8-inch round cake pan.Beat together all ingredients for cream cheese filling.  Set aside.Combine wet ingredients for cake then add the dry ingredients through the salt.  Mix well.Toss pecans, cinnamon and coconut sugar together in a separate bowl.Pour cake batter into pan and drop bits of the pecan mixture throughout batter.Top with cream cheese filling and use a knife or tooth pick to swirl it around.Bake for 25 minutes and let cool slightly before slicing.

View the original article here

Featured Blogger: Sara


Source::http://amongthetortillas.wordpress.com/?tpref=foodpress


This recipe is a clear-cut argument for adding pureed chipotle into pretty much anything. The simple addition here adds such depth of flavor that if you like spicy foods at all, you’ll wonder where this mac & cheese was in your life. It’s quickly become a must-have for any party we throw that involves plenty of people to help eat it, because really, if I made it for just Nick and I, I’d eat the whole pan!!


+ 1 package of whole wheat pasta (12-16oz or so)
+ 1 can of chipotle peppers in adobo sauce (see below for details on what to do with it)
+ pat of butter
+ 1 tablespoon whole wheat pastry flour
+ 1 1/2 cups milk (your choice of type, I generally use nonfat cow’s milk because that’s the standard in our kitchen; you may or may not want to add a little cream if you use nonfat)
+ 4-5 cups of grated cheese (I love using a mild white cheese that melts really well such as monterey jack)
+ salt & pepper, to taste


In case you’re not sure what chipotle peppers look like, here’s what to look for at the store:

1. Put your water on to boil and get that pasta cookin! (According to your package directions, of course.) Drain when cooked.


2. Process your can of chipotle peppers in a food processor until relatively smooth (it’ll always be a little lumpy; that’s OK). Set aside. (By the way, you’re going to end up with leftover chipotle after this; I suggest you store it in an airtight container and then add a little into some of your dishes here or there.)


3. Heat the butter in a pan (it’ll eventually hold all of the cheese sauce, so pick something with high-ish walls). When melted, add your flour and whisk around until incorporated. (Congrats, you just made a roux, you’re practically Julia Child!) Let the mixture cook for a few minutes, being careful not to burn it.


4. Add your milk, whisking it all together well.


5. Add your processed chipotle, and whisk together again. Now, if you’re like me and like things pretty darn spicy, you’ll want to add 4-5 tablespoons of the pureed chipotle. If you just like a little warmth but nothing outrageous, add 1 tablespoon, just to be on the safe side. If you’re not sure that you can take it, but kinda want to find out, add 3 and wish for the best. If you can’t handle any spice, step away from the chipotle! (But you sure can make it without the chipotle and it’d still be a kick-ass mac & cheese.)


6. Start adding in your cheese a little bit at a time, letting it melt between each addition.


7. *droool*


8. Once your cheese is all incorporated, and you may or may not have dipped a tortilla chip in to make sure it’s delicious, add some salt & pepper, turn the heat off and add your pasta to your sauce (or add the sauce to the pasta, depends which is the bigger pot/bowl). I call this the rivers of cheese. (Anyone know a good real estate agent so I can buy a house on the banks of this river?!)


9. Mix everything up so it’s all good and cheese-covered.


10. Put the whole thing into a lightly oiled/buttered baking dish, covering with a little more cheese on the top if you’re into that sort of thing (I’m betting that you are if you’ve gotten this far!).


11. Bake at 400 degrees for 15-20 minutes, until the top is cooked as you like it (longer cooking time = crispier top). Let it rest for at least 5 minutes before digging into it.


View the original article here

Friday, December 17, 2010

Hungarian Mushroom Soup


Source::http://katieatthekitchendoor.wordpress.com/2010/12/15/good-foodie/?tpref=foodpress
December 15, 2010 by katieatthekitchendoor

So, the friendly people over at Marx Foods recently asked the internet-at-large “What have you done to be a good foodie this year?”  And, being a member of the internet-at-large, I felt compelled to answer them.  It would’ve been rude not to, right?

And so I began pondering.  Pondering and musing.  This was my first year blogging, and I’m getting the hang of it.  My second year cooking for myself, and people seem to think I’m alright at that.  My 21st year eating, and I consider myself a master at that.  So I have some experience with food.  But what about this year made it different?  Seeing as how it’s finals week and I’m a senior in college and I’ve been having all sorts of deep thoughts about the value of a good education and how college has changed me and what on earth I am going to do in the real world, the answer came to me pretty quickly.

Learning.  This year, in the realm of food and in pretty much all the other realms of my life, the thing that has been most significant throughout my experiences has been learning.  In terms of food and blogging and eating, I’ve learned a ton.  Big things and little things.  Big things like how to take a decent food photo, how huge the difference is between high quality and cheap ingredients, and how much work (but oh how rewarding too!) blogging can be.  Little things like how to like mushrooms and tomatoes, two foods I was convinced I hated a year ago, how incredible slices of fresh avocado can taste, that cardamom is what makes danish pastries taste like danish pastries and not just any other baked good, and how to consistently make good pasta dough.  I’ve tried countless new recipes, ordered meals I wouldn’t have touched as a kid, and discovered incredible websites.  On any given day I probably spend a good hour or two thinking about food and recipes and menus – sometimes actively, but sometimes passively, like when I’m sitting in class and realize that half of my notebook is filled with flavor combinations rather than steel code stipulations like it should be.  And I like it.  I hope I can find a way to make this learning continue and deepen.

In the non-food portion of my life I’ve learned a lot too.  Probably too much to say.  So I’ll just touch on the big stuff… like how to take care of my own finances.  How to dress and talk and smile for job interviews.  How to be rejected from said job interviews.  How much I truly love to dance.  How to stop crying and pull yourself together when you’ve been dumped and your world feels shattered.  How frustrating research is.  How good independence feels.  How important being with other human beings on a daily basis is.  How little I know about what I want in my life.  How much time I have to figure it out.  How to save your last tailgate.  And on and on.

And there you have it.  That’s what’s made me a good foodie, and a good student, and good at being myself this year.  And since I couldn’t leave you without a recipe, in the spirit of learning to like new things and those friendly people over at Marx Foods, I decided to try their Hungarian Mushroom Soup.  They posted it a few weeks ago, and although they aren’t flavors I usually work with, the recipe really intrigued me.  Maybe it’s the time of year.  Maybe it’s my recent mushroom kick – now that I know I like them, I want to eat them!  Maybe it’s my inner Eastern European.  Who knows.  But I made it, and although I was apprehensive beforehand, I liked it more with every bite.  It tastes very authentic (although you should know that my only authority in that matter comes from one week in Hungary last year), and rich and the dill really comes through in a great way.  It also took 30 minutes to come together, including 20 minutes of time soaking the mushrooms, so that was a nice surprise.  Everyone loves a 10 minute meal.  The only thing that put me off about it was the chewiness of the reconstituted mushrooms – next time I would either chop them up into smaller pieces pre-soak, or blend the soup when it was finished.

One last thing… Since they asked, the gift I would most like to receive if a stocking full of edible goodies happened to arrive on my doorstep from Marx Foods would be saffron threads.  Why?  Honestly, because they are way out of my weekly food budget range, and they have such a lovely flavor and I keep having to not make recipes where they are a key ingredient.

Hungarian Mushroom Soup

Reposted from Marx Foods, scaled down to serve 2.

1/2 oz. dried mushooms1 TBS butter1/2 c. diced onion1 TBS flour1 c. milk1 tsp. paprika1/2 c. stock or water2 TBS sour cream1 tsp lemon juice1/2 tsp. dill1/2 tsp. salt1 tsp. vinegarPour boiling water over mushrooms to cover.  Let stand 20 minutes.In a medium saucepan, sautee onions in butter until translucent.  Add flour and cook for another 2 minutes, stirring constantly.Add mushrooms and their soaking water and stir until thickened.  Add milk and paprika and cook 2-3 minutes.Add 1/2 c. stock, sour cream, lemon juice, dill, salt, and vinegar and stir until all incorporated.  Cook 2-3 minutes more to let flavors combine.  Serve hot with a dollop of sour cream.

View the original article here
Peppermint Brownies


Source::http://annies-eats.com/2010/12/15/peppermint-brownies/?tpref=foodpress


In honor of the chocolate-mint combo that 99% of people seem to adore, I made these brownies.  Even though they would never be my first choice dessert, I knew “normal” people would enjoy them, particularly at the holidays.  The pretty red and white chopped Candy Cane Kisses melted on top dress up regular ol’ brownies and make them cute and festive for the season.  The good news for me is that the mint flavor is not overpowering at all.  These are still first and foremost a moist, fudgy brownie, and the peppermint flavor is more of an afterthought.  Ben and I thought the balance was just right, but if you want more of a mint kick then double the peppermint extract in the recipe.  Speaking of the recipe, I now know it by heart after making 8(!) batches for holiday baking.  But really it was just 4 batches – I don’t consider an 8×8-inch pan of brownies to be a full batch, no siree!  A 9×13-inch pan is more like it.  And I don’t think your friends, family, neighbors or coworkers will be disappointed you made some extras :)


Side note – today’s holiday giveaway is a copy of one of my very favorite cookbooks, The New Best Recipe.  See the Facebook page to enter.  Details will be posted before 7 am.  Good luck!


Peppermint Brownies
Printer-Friendly Version


Yield: 1 9×13-inch pan (about 36 brownies)
Ingredients:
8 oz. unsweetened chocolate, coarsely chopped
1½ cups unsalted butter
3 cups sugar
6 large eggs
1½ tsp. peppermint extract
1 tsp. vanilla extract
½ tsp. salt
2 cups all-purpose flour
4 (1.55 oz) milk chocolate bars, broken into segments
1 bag Hershey’s Candy Cane Kisses, wrappers removed and coarsely chopped


Directions:
Preheat the oven to 350° F.  Line a 9×13-inch baking pan with foil and spray lightly with cooking spray.


Combine the chocolate and butter in a heatproof bowl set over simmering water; heat, stirring occasionally, until completely melted and smooth.  Remove from the heat.  In a large mixing bowl, whisk together the chocolate mixture with the sugar and eggs until well blended.  Whisk in the peppermint and vanilla extracts and the salt.  Whisk in the flour just until incorporated.


Spread half of the brownie batter into the prepared pan.  Layer with the milk chocolate pieces.  Spread the remaining batter evenly over the milk chocolate pieces.  Bake 30-35 minutes.


Remove the brownies from the oven but maintain the oven temperature.  Sprinkle the chopped Candy Cane Kisses over the top of the brownies and return the pan to the oven for 3 more minutes.  Transfer to a wire cooling rack and let cool to room temperature.  Chill the brownies until the candy topping has firmed up.  Slice and serve.


View the original article here